Finding Light: A Guide to Making your Wedding Photos even more STUNNING
A quick note before we begin!
Light is the KEY to making your photos gorgeous. I am obsessed with light, as many photographers are, and I’m very familiar with it. I’ve been doing photography since I was a wee lil babe, so I’ve had a lot of time to learn everything there is to know about light.
All of this is to say, I do not expect the following information to stick right away!
It might feel overwhelming which is why I am here to answer any additional questions you have. If we end up working together, you’ll find that I’ll be working with you every step of the way to ensure that we secure the best lighting possible for your wedding day. Take a deep breath and dive in with me to learn about the different types of lighting and what types of images different light will produce. Let’s go!
Types of light I’ll be covering:
Flat Lighting
Golden Hour / Blue Hour
Side Lighting
Backlighting
Direct Light
Silhouette Lighting
Flat Lighting
Flat lighting is a photographer’s dream. When we work in flat lighting, we don’t worry about missing any details or images that have too much contrast. Flat light is also known as diffused light. Outside, diffused light can be caused by shade or cloud cover. With shade, there is still light on the scene, but the light is soft and easy to manage. If there is cloud cover, the light from the sun is spread as it hits the cloud, causing a blanket of light with the same quality throughout. This allows for low contrast in the scene which is wonderful when photographing someone in the great outdoors, or when setting up inside to ensure no one ends up in the shadows. It is also very flattering light because it softens the features of the subject. Flat lighting isn’t something you will have much control over outdoors. If the time is earlier in the day when the sun is directly overhead, we will seek out flat light in the shade of the tree or buildings. When we are taking photos inside, I have much more control over creating flat light using my flashes. Instead of aiming the flash at my subject, I bounce it off a white surface to diffuse the light and send it in all directions.
Flat light produced by shade cover on a sunny day. Notice that there aren’t any harsh shadows on Lauren and Irving.
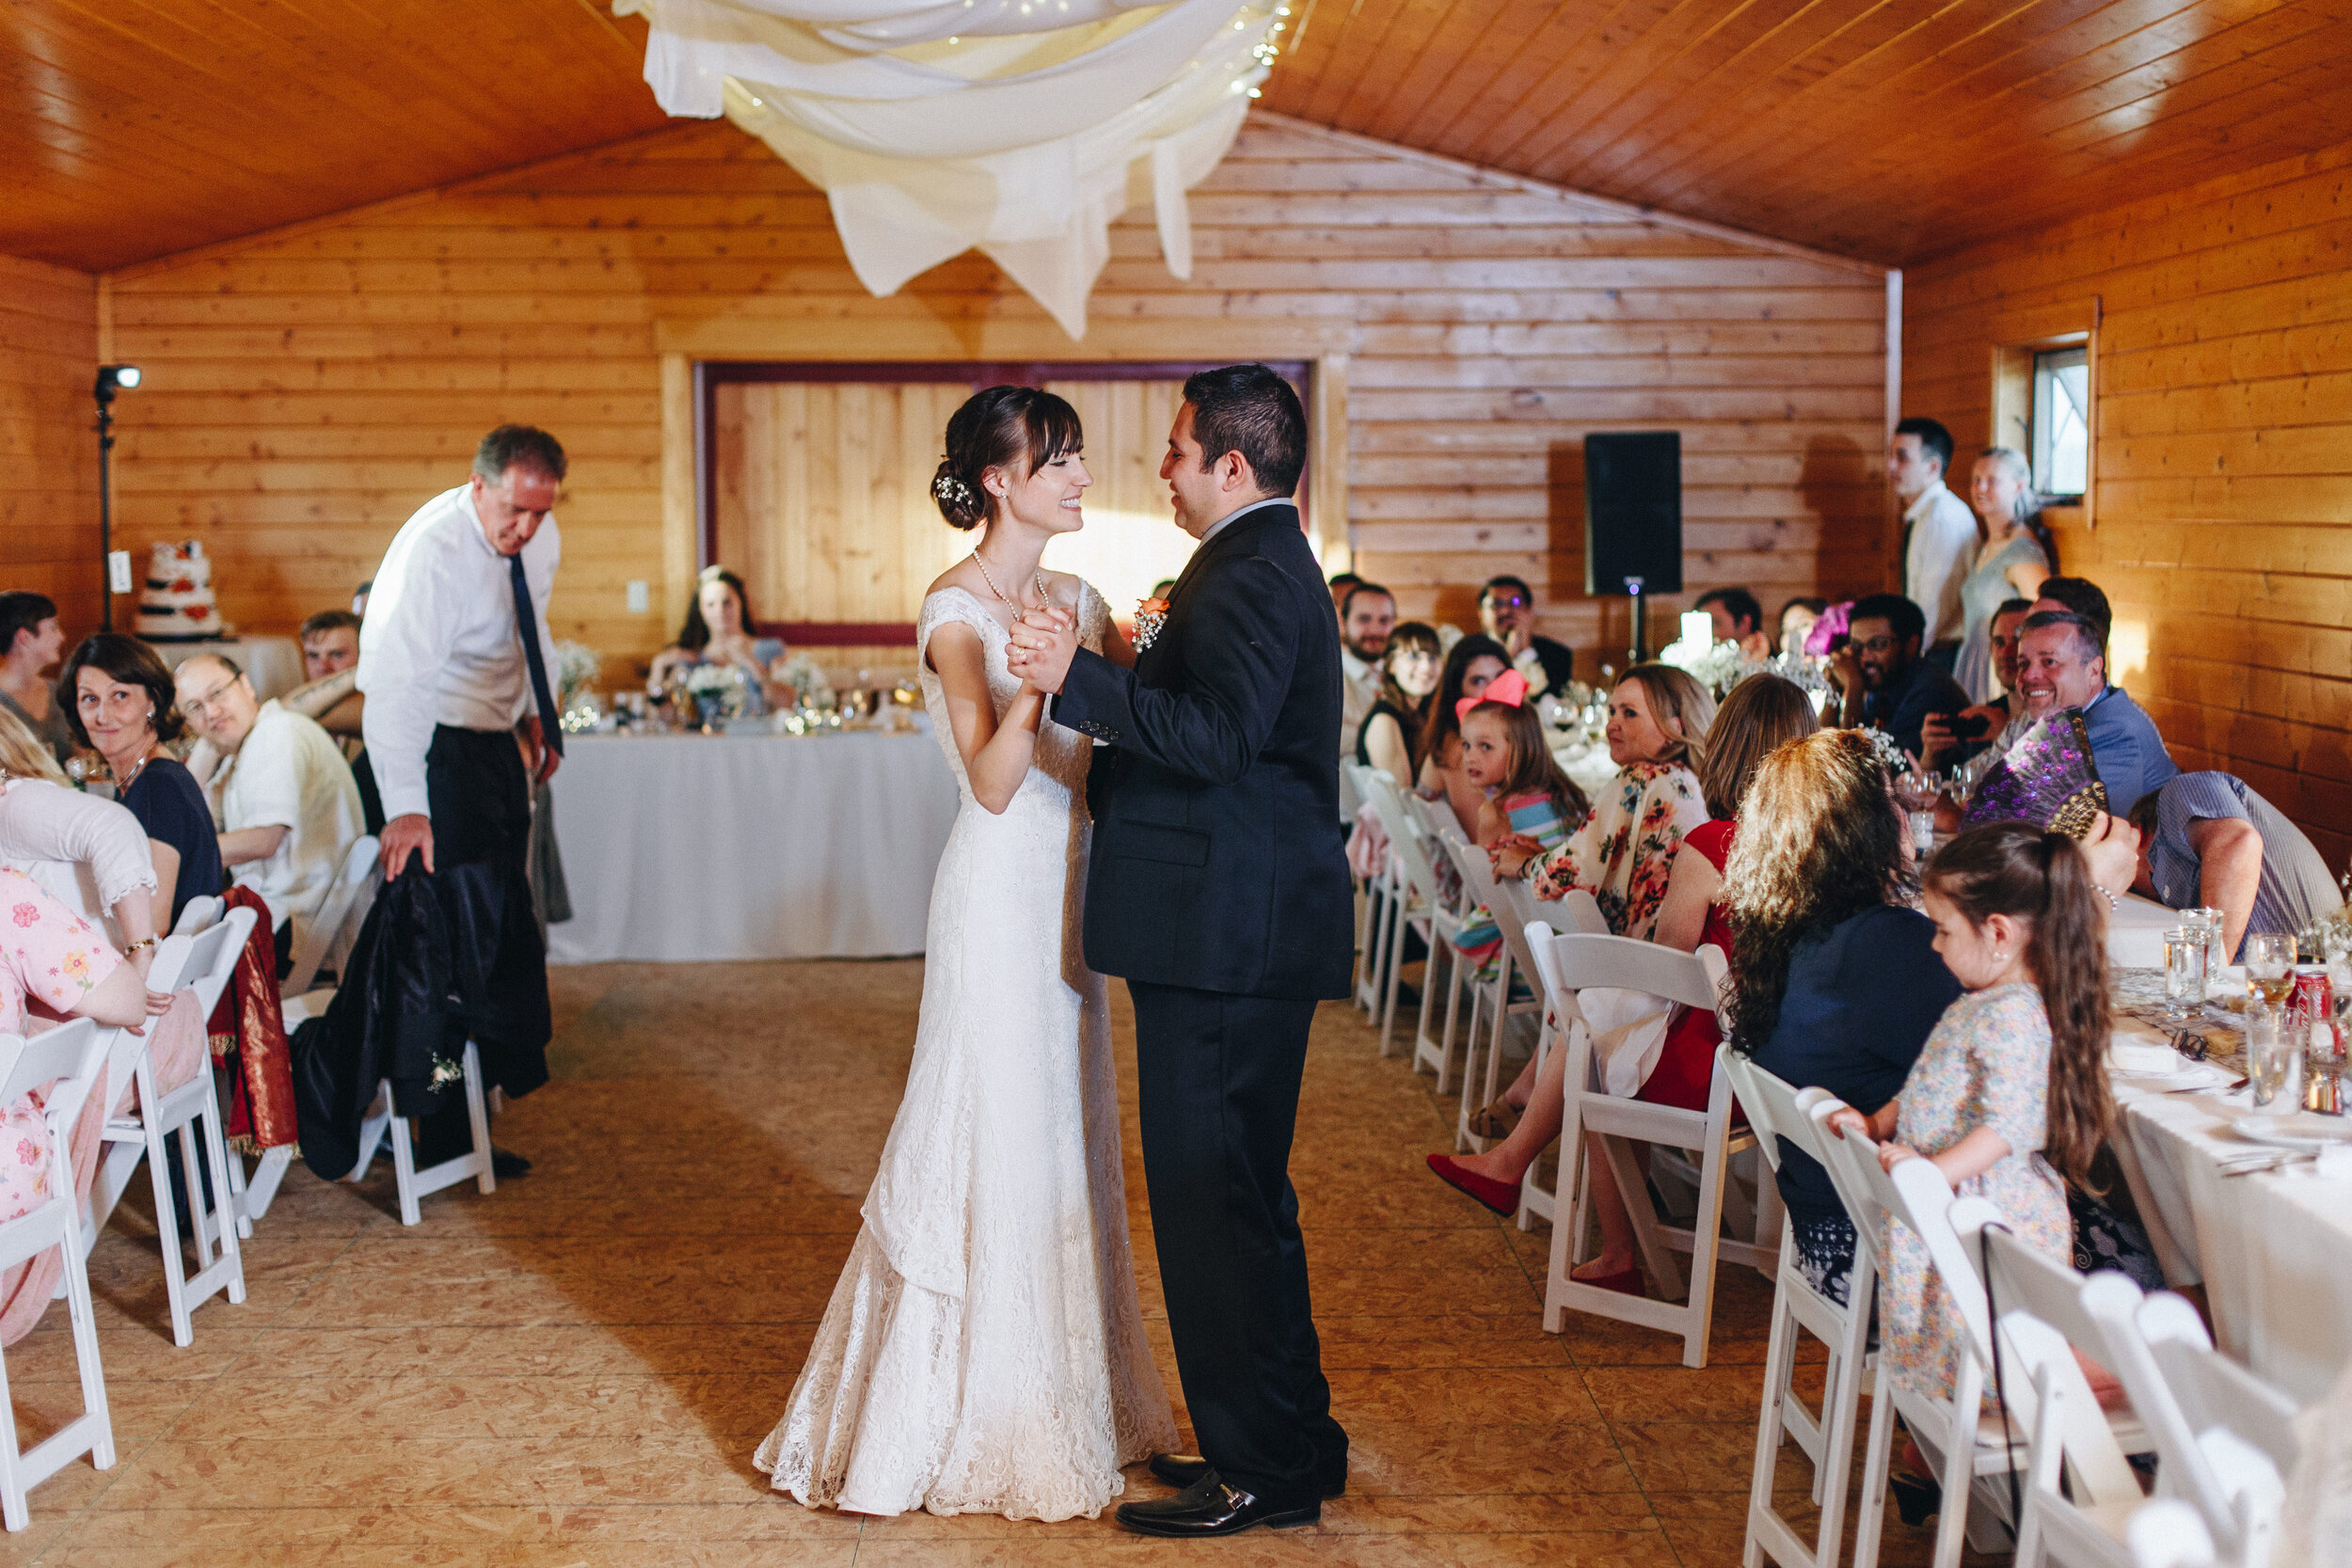
This flat light is produced by my flash which is bouncing off of a white surface and diffusing the light so everyone in the scene is evenly lit.
Golden Hour / Blue Hour
Golden hour and blue hour are versions of flat light. As the sun begins to dip below the horizon, the light in the sky and light on the subject begin to meet in the middle, taking away the contrast from earlier in the day. Golden hour typically occurs when the sun is just dipping below the horizon. Blue light is just after, when the sun is still softly lighting the sky, but there is no direct light on the subject. There is very low contrast, hence the reason it’s still considered flat light. Of course, this is a favorite time for a lot of couples because the portraits can be absolutely stunning. As you build your timeline, I encourage you to scoop out some time during Golden hour or Blue hour for a few photos, even if it means stepping out of your reception for 15 minutes. You can review the specific timing of Golden/Blue hour with your photographer to determine what time it will occur on your wedding date. Factors that alter this are the time of year (sun will set earlier or later), the nature of the horizon (mountains, hills, buildings, etc.), and the weather forecast (cloud cover can sometimes eliminate the beautiful rays of Golden hour and will look more like Blue hour).
Taking advantage of blue hour with Lauren and Irving. We stepped out of the reception while the guests were enjoying dinner for a few quick snaps.
Enjoying blue hour with Lauren and Irving.
Blue hour with Lauren and Irving which creates gorgeous, mellow, and mostly even lighting.
Side Lighting
If anything, side lighting is one of the most interesting types of lighting. When you look at the photos below, you can see that light is coming in from one side of the image, only illuminating half of it. The other half is shrowded in darkness, and it creates more contrast. Side lighting isn’t always so contrasted, but in the samples below, you’ll see that it is. This particular look is unique, and one that you won’t find as often in your photos because there won’t be as many opportunities for them. In all of the examples below, there is a window to the side with light streaming in. This is the most common form of side lighting, but there are other scenarios where this type of light can happen, too.
Notice that Lauren and Irving have light on their faces while the Maid of Honor does not. The light in this is coming in from a window to the left and is only illuminating the scene from one side.
Again Lauren is lit by side lighting from the window beside her. There is not other light illuminating her which is why the left side of the image is brighter than the right side of the image.
Lauren is lit by side lighting as the window provides illumination on her face and dress. You can see that the scene to the left drifts into darkness since there isn’t additional lighting from another direction.
Backlighting
The samples below are of backlighting. Backlighting is when the main source of light, oftentimes the sun, is directly behind the subject. Because the light is brighter behind the subject, it will often create a halo effect around them which also separates them from the background. See in the photos below how Lauren and Irving have light outlining them? On the left, they’re backlit by the sun, and on the right, they’re backlit by artificial light from my flash. This type of light is definitely one of my favorites because it really adds dimension to photos and creates additional interest in the frame.
In this photo, Lauren and Irving have the sun behind them. They have a halo effect around them which sets them apart from the background filled with an incredibly adorable assortment of animals.
As Lauren and Irving left the venue, their friends and family threw chicken feed at them. I illuminated them from the behind to cut them out of the background and to really the scene pop.
Direct Light
Direct light is just what it sounds like. When I photograph my subject and the sun or source of light is directly behind me and my camera, it fully illuminates my subject from the front. In the samples below, you can see subjects in direct light Notice how bold and blue the sky is? This is because the sun is equally illuminating the subjects and the scenery around them. Direct light can be amazing, but I don’t use it as often as other types of light because it’s generally flatter looking as there are no shadows or clear dimension in the photos. Not to mention, when taking photos in direct light, it’s very hard for my subject to look directly at the camera as the light is often overpowering, which is another reason I tend to shy away from it. When it is done correctly, though, it can be wonderful.
Lauren and Irving with the sun shining directly on them. As you can see, the colors are very bold.
This photo is from behind their ceremony which illuminates everything in the scene equally. From the other direction, they were backlit as the sun was behind them.
Silhouette
Silhouettes are a more extreme version of backlighting. In this case, the subject is directly in front of the bright background. The subject doesn’t have a ton of light on them to begin with, and the photographer exposes for the sky or scene behind them. This make the image simple with a dark foreground and lighter background, and often the details of the photos are too dark to see. Silhouettes are a beautiful way bring attention to the surroundings or to focus on the action of the subject without letting details of the photo detract from the scene.
Lauren silhouetted by the window as she sits down to read a note from Irving.
A silhouette of Lauren and Irving during the last bits of light of the day.
In Summary
So! How did it go? There are different types of light that go into the look of a photo. It may feel like a lot of information to take in, but it can be very useful in planning your big day. Using this toolkit, you can work with your photographer to build a timeline that takes advantage of different lighting scenarios. For example, if your wedding is outside, I often recommend trying to make it fully shaded for a nice, diffused light, or you can try to backlight it so there’s a beautiful halo effect around you. When getting ready, think about your location. Does it have a nice big window for light? No worries if not, I have my lights and will make magic of any scene! But, those windows sure do produce some stunning light so it’s always good to consider. Can you carve out some time for photos during sunset or Golden hour? You won’t regret it as that is often the most beautiful time of day to photograph. Don’t forget, you two are going to look SUPERB and this is a once in a lifetime event, after all. Making the most of the light during your wedding is a great way to really bring your photos to life. Ultimately, there are a lot of factors that will determine where your wedding takes place, what time of day it occurs, etc. but in an ideal world, you will try to incorporate the best lighting scenarios possible whenever you can. Work with me to ensure that we take advantage of all the light as to offer. Or, consider looking up what the light will be doing on your special day by downloading an app called Lumos. It allows you to put your wedding date in and will tell you where the sun is going to be relative to the horizon throughout the day. So, if you’re wondering if your afternoon wedding will be directly under the rays of the sun casting those raccoon shadows, this app will be able to tell you. You will hopefully be empowered to make scheduling and location decisions that will really make the most of the light.
Let’s talk more! I love light and could really go on forever, but I won’t. If you have any questions or comments, I’d love to hear them. Reach out here.
XOXO,
SAVANNAH